Mostrando entradas con la etiqueta Tintes. Mostrar todas las entradas
Mostrando entradas con la etiqueta Tintes. Mostrar todas las entradas
viernes, 28 de septiembre de 2012


viernes, 10 de agosto de 2012

jueves, 19 de julio de 2012
Stencil jugando con tamaños
Put the Stencil of your choise on your object.
Pour your fabric paint colors on a plate.
Soak your brush ınto the paint. In order to get rid of the excess paint tap it on a paper 2-3 times.
Tap the paint that is left on the brush vertically.

Practical idea:
On the fabric paint it tells you to
iron the object for some amount of time. Instead of doing this I put it
inside a roasting bag and popped it in the oven to cook (at around 150
degrees C) for about 5 minutes. I have never tried to iron them but the
tshirts that I have cooked has been washed and ironed many times and
nothing has happened to the painting.
On the roller blind, I didn't bake it
and I didn't iron it . The sun is falling on it so I thought that it
will cook by itself in time. Now, water is comming on it, sometimes
detergents are dripping, but nothing has happened to it also. Result:


visto en http://kendimesaklamam.blogspot.com.es/2012/03/kumas-boyama-fabric-dyeing.html
viernes, 6 de julio de 2012


martes, 3 de julio de 2012


sábado, 30 de junio de 2012


lunes, 18 de junio de 2012
Teñido a rombos: cruz y rombo
For this X, I folded the shirt in quarters, then accordion pleated
diagonally from the center to the outer corners. I used the
full-strength dyes in sections on one edge of the pleats, and the
diluted dyes in the same sections on the edges of the other side.
That's what gives it the dark-light-dark effect, which is especially
noticeable in the turquoise stripes.
 It's
hard to see in these photos, but the dyes spread differently on the
cotton than they did on the cotton/poly. Remember that I applied the
dye to dry, washed t-shirts. On the cotton, the dye tended to stop
spreading and not blend quite so much. On the cotton/poly, the dyes
tended to spread out more and blend more, giving a more "smeared" effect
as seen in the diamond shirt below. Close up, the cotton/poly also has
a more "heathered" appearance because the white polyester fibers don't
pick up the dye. This diamond shirt is the one cotton/poly shirt that I
did not wash before dyeing.
It's
hard to see in these photos, but the dyes spread differently on the
cotton than they did on the cotton/poly. Remember that I applied the
dye to dry, washed t-shirts. On the cotton, the dye tended to stop
spreading and not blend quite so much. On the cotton/poly, the dyes
tended to spread out more and blend more, giving a more "smeared" effect
as seen in the diamond shirt below. Close up, the cotton/poly also has
a more "heathered" appearance because the white polyester fibers don't
pick up the dye. This diamond shirt is the one cotton/poly shirt that I
did not wash before dyeing.

The diamond pattern is folded the same way as the X, except the pleats are folded on the other diagonal, from the underarm to the neck.
Visto en http://blog.amethistle.com/2008/02/review-of-tulip-tie-dye-kit.html
Y otros rombos? (ikat dyeing)

 It's
hard to see in these photos, but the dyes spread differently on the
cotton than they did on the cotton/poly. Remember that I applied the
dye to dry, washed t-shirts. On the cotton, the dye tended to stop
spreading and not blend quite so much. On the cotton/poly, the dyes
tended to spread out more and blend more, giving a more "smeared" effect
as seen in the diamond shirt below. Close up, the cotton/poly also has
a more "heathered" appearance because the white polyester fibers don't
pick up the dye. This diamond shirt is the one cotton/poly shirt that I
did not wash before dyeing.
It's
hard to see in these photos, but the dyes spread differently on the
cotton than they did on the cotton/poly. Remember that I applied the
dye to dry, washed t-shirts. On the cotton, the dye tended to stop
spreading and not blend quite so much. On the cotton/poly, the dyes
tended to spread out more and blend more, giving a more "smeared" effect
as seen in the diamond shirt below. Close up, the cotton/poly also has
a more "heathered" appearance because the white polyester fibers don't
pick up the dye. This diamond shirt is the one cotton/poly shirt that I
did not wash before dyeing.
The diamond pattern is folded the same way as the X, except the pleats are folded on the other diagonal, from the underarm to the neck.
Visto en http://blog.amethistle.com/2008/02/review-of-tulip-tie-dye-kit.html
Y otros rombos? (ikat dyeing)


Teñido a nudos: corazón
Michael
Fowler's "Tie Dye Heart Pattern" instructions:
"1. Lay your prewashed blank apparel or fabric flat on a table.

"2. Wet the fabric until it is uniformly damp (spray bottle), but not dripping. Then, fold the fabric in half- down the middle of the fabric (as shown above). This step is similar to a heart cutout on paper.

"3. Create a heart template on cardboard/posterboard or draw a freehand half-heart. Use a fabric marker or heat-transfer pencil to temporarily markup the fabric.


[end of quote from Michael Fowler's "Tie Dye Heart Pattern" instructions]
Visto en http://www.pburch.net/dyeing/dyeblog/C1056414315/E20060502093756/
"1. Lay your prewashed blank apparel or fabric flat on a table.
"2. Wet the fabric until it is uniformly damp (spray bottle), but not dripping. Then, fold the fabric in half- down the middle of the fabric (as shown above). This step is similar to a heart cutout on paper.
"3. Create a heart template on cardboard/posterboard or draw a freehand half-heart. Use a fabric marker or heat-transfer pencil to temporarily markup the fabric.
"4. Accordion fold the fabric along the drawn heart-shape line, forcing it
into a straight
line.

"Note: Often hearts are made by stitching the shape and resist dyeing, the heart shape is created by the undyed, resisted areas. These illustrations detail how to fold a heart and the technique will also transfer to many other popular shapes.

"5. Once the arc of the curve is forced into a straight line, the fold becomes a straight accordion fold.


"6. Your accordion folded line should now reflect a small straight line (shown directly above).

"7. View the small portion above. Dye placed in the small area will create the dyed shape of the heart.

"8. Use cotton string to tie along the drawn line. To create a color ring (band) around the heart, tie an additional parallel band. (optional)

"Note: Often hearts are made by stitching the shape and resist dyeing, the heart shape is created by the undyed, resisted areas. These illustrations detail how to fold a heart and the technique will also transfer to many other popular shapes.
"5. Once the arc of the curve is forced into a straight line, the fold becomes a straight accordion fold.
"6. Your accordion folded line should now reflect a small straight line (shown directly above).
"7. View the small portion above. Dye placed in the small area will create the dyed shape of the heart.
"8. Use cotton string to tie along the drawn line. To create a color ring (band) around the heart, tie an additional parallel band. (optional)
"To dye the heart, place a dye color in the smaller area next to the tied
cotton string (or rubberband) and use your hands to squeeze/blend a solid color
w/ little or no white areas. The heart looks great with or without a color band
(parallel line of color placed on the outside of the heart line) to define the
shape.
"The outside fabric color (bleed area) also defines the heart shape and you
will also get a resist from the tied string that creates an outline of the
heart. For further details on applying dye colors, view Michael Fowler's Art of Tie-Dye DVD. "
[end of quote from Michael Fowler's "Tie Dye Heart Pattern" instructions]
Visto en http://www.pburch.net/dyeing/dyeblog/C1056414315/E20060502093756/
miércoles, 13 de junio de 2012
Teñido a nudos
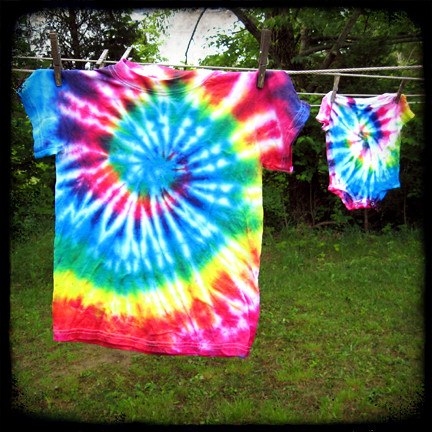
swirl tie dye
 |
Pinch and twist Before beginning, read the Tie-Dye how-to instructions and refer back to them for standard steps. Prewash fabric to remove sizing. Do not use fabric softener or dryer sheets. Cover work surface with a plastic tablecloth. Lay fabric flat on work surface. Decide the area on the fabric where you want the swirl to be. Pinch fabric at this point. Twist fabric around into a flat spiral. |
 |
Bind
Bind with rubber bands, creating 6 wedge shapes. Use more rubber bands as desired. |
 |
Apply Dye
Apply Dye on wedges using as many colors as desired, in the desired arrangement – alternating wedges, connecting wedges, etc. or use a single color. Cover fabric with plastic. Let set 4 to 6 hours. Remove rubber bands. Fill washer to large load setting with hottest water suitable for fabric and a small amount of non-bleach laundry detergent. Wash and dry separately. |
Visto en http://www.favecrafts.com/Tie-Dye/Swirl-Tie-Dye-Technique-from-Tulip/ct/1

Mas detalles http://images.dharmatrading.com/images/public/instructional/tiedyeinstructions/tiedye_bw_pamphlet.pdf
viernes, 4 de mayo de 2012

sábado, 14 de abril de 2012
domingo, 25 de marzo de 2012
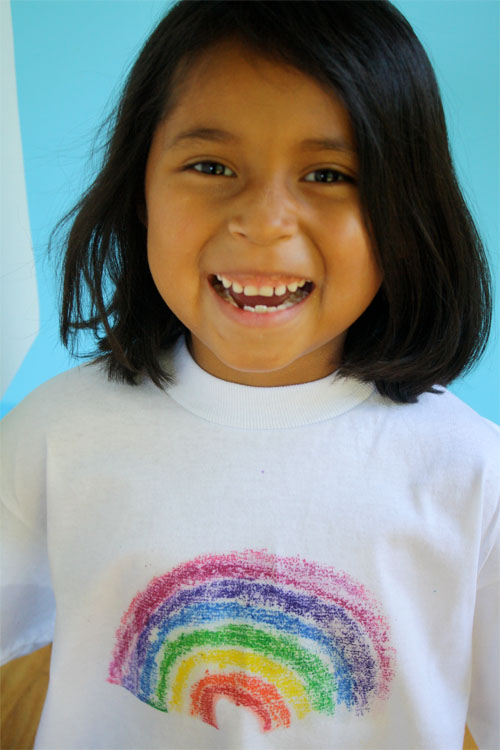
Camiseta pintada con lija y ceras de colores
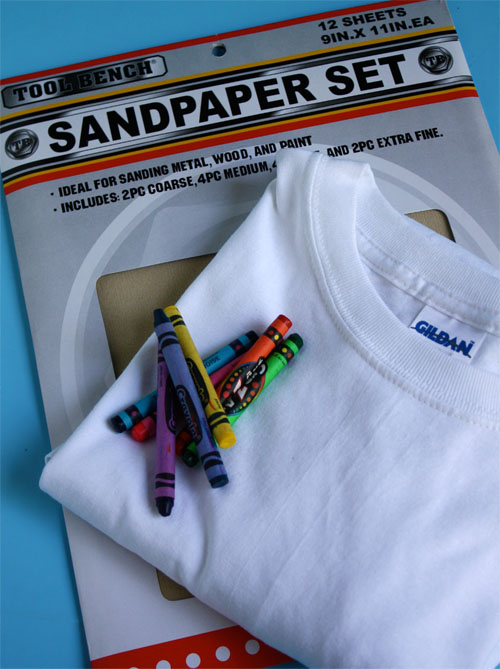 good quality crayons, a t-shirt, iron and fine sand paper. Our package
of sandpaper had a selection and we used the finest. The more coarse
sandpaper will provide more texture. Give them all a try!
good quality crayons, a t-shirt, iron and fine sand paper. Our package
of sandpaper had a selection and we used the finest. The more coarse
sandpaper will provide more texture. Give them all a try!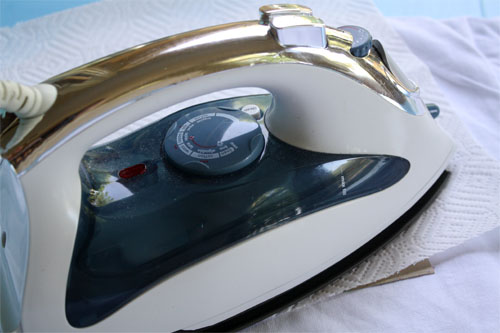
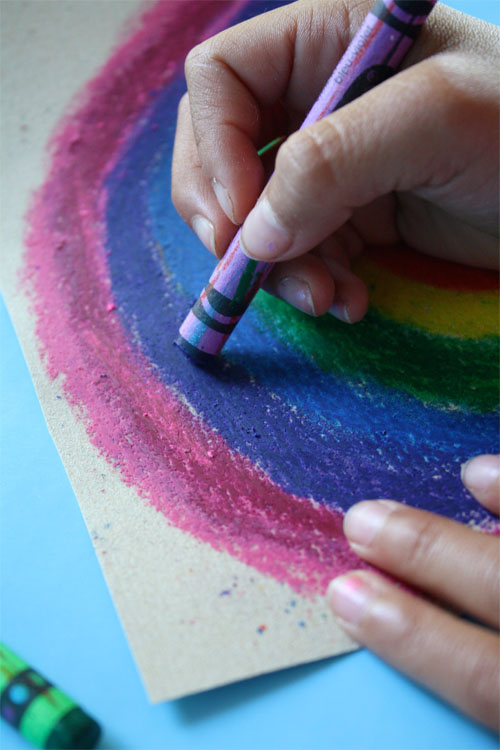
Remove the sandpaper. You’ll have a print with loads of cool texture–not to mention a new darling t-shirt.
 Visto en http://alphamom.com/family-fun/crafts/sandpaper-printed-t-shirt/
viernes, 16 de marzo de 2012
Estampar con material de reciclaje
Increible cómo quedan estos estampados hechos con trozos de poliespan, goma y otros objetos de desecho

sábado, 4 de febrero de 2012
Sellos hechos con plastilina

We don't call playdough the most versatile material/tool for creative play without reason! That pink salt dough that we made this past Friday has triggered so many ways to create and play.
Visto en http://www.mommy-labs.com
viernes, 3 de febrero de 2012

Suscribirse a:
Entradas (Atom)