
For this project I used:
Several boxes of crayons from the dollar store
100% Cotton fabric (light color)
Fabric Spray Dye (black)
Black Fabric Pen
Cheap paintbrushes
Muffin Tin
Newspaper
Iron

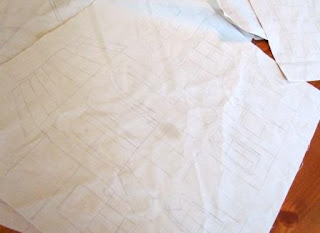
First, I cut the light fabric into two 12” squares. I also cut a
bunch of 6” squares with the idea of creating more batik blocks for a
future table runner, but I ended up setting them aside to concentrate on
the two pillows I wanted to create. I wanted a colorful town street
scene, so I drew in pencil the basic design that I wanted.

Okay, now we get into
where I had to do some edits on my instructions. The original
instructions called for melting the crayons in little cups that you make
out of aluminum foil and floating them in a pan of boiling water. Which
actually might have been a good idea in hindsight. But I decided to
melt them in an old muffin tin in the oven. I peeled and broke up three
to four crayons per color in the muffin tin and put them in a 275 degree
oven.

They took about 5 minutes to melt. Don’t worry- it doesn’t stink up the kitchen. Actually, this part was rather easy to do. *Edit:
One of my readers suggested using candle melting plates which might
work even better to keep the wax melted while painting. If you use the
oven, be sure to supervise the melting of the wax carefully.

Lay your fabric on aluminum foil to prevent the wax from going
through to your counter. Start a small pan of boiling water to use to
clean your brushes as you go. I used very inexpensive brushes for this
project as I was planning to throw them away afterward.

Dip your brush in the melted wax and then start painting away! I
found that I needed to put the tin back in the oven about every five
minutes or so to re-melt the wax, so it is quite possible that the
method the magazine suggested might have been a bit easier. But I
certainly have a tendancy to do things the hard way. (Suggested clean up
for this part of the project- I threw away the brushes, and the
hardened wax was easy to pop out of the muffin tin for future use. Any
residue in the pan can be re-melted in the oven for a minute or two and
then wiped away). Do not pour hot wax down your drain!

Once the entire piece of fabric is covered with colored wax, it is
ready for the next step- adding dye. Take each piece of wax covered
fabric and wad them up in a ball, creating many tiny cracks in the wax.
The instructions called for cold water dye with good reason. If you
added this to hot water- all your wax would melt! Unfortunately, the
only dye that I could find that did not call for hot water was spray dye
that I found at my local craft store. No problem. I simply laid the
pieces of fabric out on trash bags and then sprayed the crap out of them
with the spray dye. I then patted them down with paper towels to get
off the extra dye and let them dry overnight.

They looked terrible at this point and I was a bit worried. But I had faith.
 The next step is to lay them between two pieces of newspaper and
using an iron set at the highest setting, begin to iron out the wax. You
will have to change the newspaper quite often, and I’m not gonna lie,
this took a while. I went through an entire Sunday paper on this
project.
The next step is to lay them between two pieces of newspaper and
using an iron set at the highest setting, begin to iron out the wax. You
will have to change the newspaper quite often, and I’m not gonna lie,
this took a while. I went through an entire Sunday paper on this
project.

But look at the result! Wow!
My final step on the batik design was to add a few details with a black fabric pen.


I made mine into pretty city pillows to put on my guest bed, but
you can do anything with this batik fabric that you might do with
regular fabric. Quilts, tablecloths, dresses, table runners, whatever.
In fact, it would probably make awesome Christmas pillows using a
Christmas design.
If you enjoyed this tutorial, you might enjoy my Flip Flop Pillow tutorial. How to create a whimsical pillow that will give a room a summery look.Or check out my Ukrainian egg tutorial- another method of batik that creates a very detailed look, using beeswax as the resist and dye, you can create amazing egg art.
No hay comentarios:
Publicar un comentario